
Overview
- Purpose: To configure a custom field at the Invoice Line level within Redmap without establishing a sync/integration to Pronto.
- Outcome: Users can manually populate custom line-item data (e.g., Brand dropdown) during stages such as Non-PO Approvals, enabling internal search, filtering, and reporting directly in Redmap.
Step-by-Step Instructions
- Access Administration
- Navigate to Administration and select Invoice Lines (or Edit Invoice Lines).

- Navigate to Administration and select Invoice Lines (or Edit Invoice Lines).
-
Create the New Custom Field
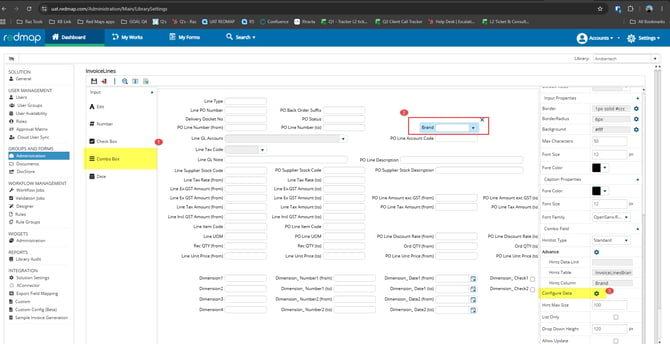
- Add a new field matching the specific field type requested by the client (e.g., for dropdown selections like Brand, select the Dropdown/List field type).
- Set the field name and properties to align with the client’s request requirements.
-
Configure Custom Data Settings (Manual Entry)
- Because this field does not sync from Pronto, data must be manually populated into Redmap.
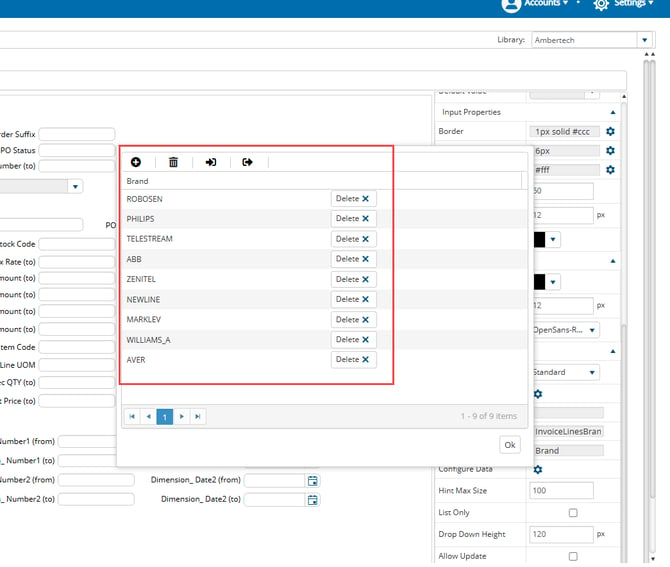
- Obtain and confirm the full list of dropdown options directly with the client.
- Click on the newly created field, open Configure Data Settings, and manually enter the client-provided values. Save the list configuration.
-
Assign Field to the Target Queue / Stage
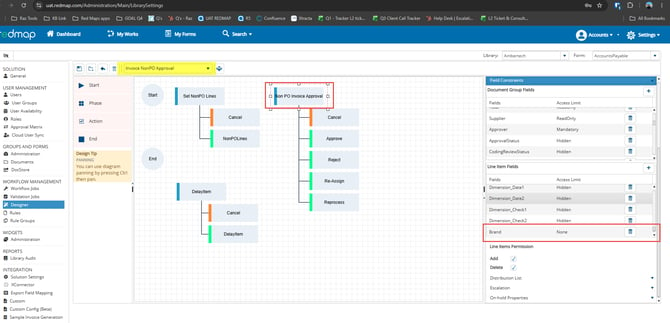
- Map the newly created line-item field to the designated queue or workflow stage.
- Added the Brand field to Line Item Fields for the Invoice Approval queue.
Validation & Deployment
- Test the configuration in the UAT environment and inform the client to also test the field.
- Once confirmed, create a ticket to Cloud to apply the request in Production.
- Map the newly created line-item field to the designated queue or workflow stage.
Note: Please ensure that any custom field addition or scope check is first raised and confirmed with the Account Manager.
Related Ticket:
https://app-ap1.hubspot.com/contacts/47452820/record/0-5/249797662196